


Pre- and Post-Run Foam Rolling Tips
Learn how to prepare before your run and cool down properly afterward with these foam rolling Pro Tips.
April 16, 2020
Getting ready to go on a run? Running isn’t solely about lacing up your shoes and putting one foot in front of the other. Before you begin your workout, you need to stretch and help warm up your body.
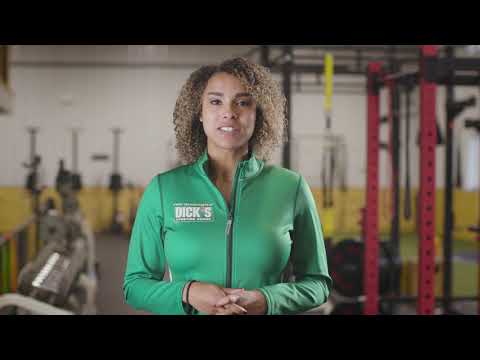
Adding a piece of equipment to your stretching routine can help you get ready for your next run or cool down afterward. A foam roller is a great tool to help you find those tender muscles and mix up your routine. Foam rollers, according to personal trainer Britny Fowler, are also a key piece of equipment for athlete recovery.
Learn how to use a foam roller before and after your run with these tips.
PRE-RUN FOAM ROLLING
Foam rolling isn’t intended to take the place of a dynamic warmup before a run. However, according to Fowler, runners should use a foam roller prior to a dynamic warmup. “Use a foam roller to reintroduce movement to tight areas before your dynamic stretching,” she says.
There are two areas you’ll want to focus on: the adductors and your upper back.
HOW TO FOAM ROLL YOUR ADDUCTORS
There are two zones in your adductors.
- Zone 1: Just above the knee to halfway up your thigh.
- Zone 2: From halfway up your thigh to just below the crease of your hip.
To begin working your adductors, lie face down on the ground or on a yoga mat. Place the roller at the bottom of Zone 1. You can use your forearms for support, placing them on the ground with your palms facing down.
Then, you will follow a three-step formula:
- Slowly roll Zone 1 until you find a tender spot. Once you find a spot that’s tender, hold the roller still for 30 seconds.
- Roll up and down four times.
- Bend your knee twice. Fowler says this can help lengthen your muscles. Keep your opposite leg still on the ground while your other leg performs the knee bend.
Remember to repeat the same three-step process on Zone 2. Once you’re finished with both zones, place the foam roller at the bottom of Zone 1 on your opposite leg. Repeat the process once again, working both zones.
HOW TO FOAM ROLL YOUR UPPER BACK
To stretch your upper back, flip over on the ground or onto your mat. This way, your chest should be facing the ceiling. Once you’re in position, place the foam roller just below your shoulder blades. Place your hands behind your head for additional support.
Your knees should point toward the ceiling and your feet should be flat on the ground. Your legs will form an inverted V-shape. Your buttocks should also be on the ground or mat. Your lower back will be off the ground, due to the foam roller placement underneath your shoulder blades.
Once you’re comfortable, lift your hips. Begin to roll from the bottom of your shoulder blades to the top of your upper back. Your knees should be higher in the air, but your feet will remain on the ground.
“Again, hold on tender spots,” Fowler suggests. “Then, roll up and down through the area. Finally, set the hips down and shift the upper body side to side to free up the tissue.”
When shifting from side to side, bring your hips back down to the ground. Your legs will return back to the V-shape formation similar to when starting the stretch. Once you’re finished, move on to your dynamic warmup and get ready to run.
POST-RUN FOAM ROLLING
You’ve finished your run. It’s tempting to immediately hit the shower and get on with your day. However, be sure to implement a proper cooldown to your running routine. One way to do this is by foam rolling after running and some stretching.
“A foam roller is a great tool to aid in recovery by improving circulation and restoring normal muscle length,” Fowler says. She suggests starting to foam roll 5-10 minutes after your run.
There are three muscles to focus on after a run: calves, quadriceps and glutes. “For a recovery roll, the goal is to slowly roll through the entire muscle, about an inch per second,” she says.
HOW TO FOAM ROLL YOUR CALVES
To start, sit on a flat surface, whether it be the ground or a yoga mat. Extend the leg that you’re foam rolling and bend the knee of your opposite leg. Your bent knee should be pointing toward the ceiling in an inverted V-shape. Meanwhile, put your hands flat on the ground parallel to your shoulders to help keep you steady.
Place the foam roller just above your ankle. You have the option to do one or both legs at the same time. For this example, we’ll explain how to foam roll with one leg on the roller.
Start by lifting your hips. Once you’re in position:
- Slowly roll your body forward. The roller should come up just below your knee.
- Return to the starting position, slowly rolling backward. Your hip should be back on the ground.
- Repeat the motion for 60 seconds.
- Switch to the other leg and repeat the steps.
Once you’re done, it’s time to move up to your glutes.
HOW TO FOAM ROLL YOUR GLUTES
Place the foam roller on the ground. Next, bring yourself on top of the foam roller, with your hips on top. Your feet should be on the ground and your knees bent. Keep one hand on the ground for support. Place your other hand on the knee closest to you for additional support.
Rotate your body slightly. This can help bring more pressure to one side of your glutes. Then, begin to slowly roll up and down your glutes for 60 seconds. Repeat the same motion on the other side of your glutes.
Once you’re finished, move onto your quadriceps.
HOW TO FOAM ROLL YOUR QUADRICEPS
Lay on the ground with your stomach facing the ground. Place the foam roller just above your knee. Use your forearms for support, laying them on the ground or mat. Keep your palms facedown, too.
Your other leg can rest on the ground, unless you are rolling both at the same time. However, rolling both legs or one leg at a time will depend on the size of your foam roller, according to Fowler.
Once you’re set:
- Slowly roll down. Your foam roller should come to your hip.
- Return to the starting position, with the foam roller just above your knee.
- Repeat the motion for 60 seconds.
- Switch the foam roller to your opposite leg and repeat the steps.
Foam rolling can help energize you before your run and help you recover afterward. It’s important to implement proper warmup and cooldown techniques into your running routine. Use these Pro Tips before and after setting out for your next trek.
Looking for more tips on foam rolling? Learn the difference between a foam roller, a massage stick and a massage ball and what each has to offer with Pro Tips.

© 2025 DICK's Sporting Goods
*Price Promotions - Due to manufacturer restrictions, select new release and other specified products are excluded from price promotions. Additionally, there are restrictions on the use of coupon codes.
If you are using a screen reader and are having problems using this website, please call 877-846-9997 for assistance.