


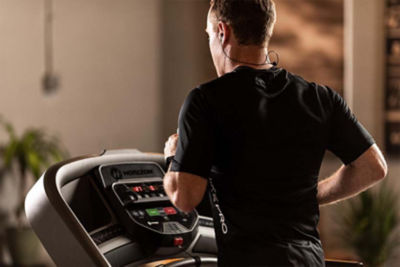
Intro to Indoor Cycling
Get ready to ride with our beginner’s guide to this high-intensity workout.
December 22, 2016

Indoor cycling or “spinning” is a popular high-energy studio workout that’s the perfect complement to any fitness routine.
“It is great cross-training for runners, avid bikers or just someone who wants a low-impact, high-intensity workout,” says instructor and DICK’S Sporting Goods Associate Alexandra Tatarzyn. “It’s also fantastic for the beginner exerciser. Just come to class with an open mind and listen to your instructor.”
Start here with the basics.

AVERAGE CLASS LENGTH:
45 to 60 minutes.
YOU'LL BURN:
An average of 400 to 700 calories. Wear an activity tracker or heart-rate monitor for an exact total.
YOU'LL TONE:
Every major leg muscle. With correct form and posture, indoor cycling will also help to tone your abdominal muscles.
WHAT TO BRING:
Water and a hand towel.
WHAT TO WEAR:
Go for comfort. Moisture-wicking tops and compression pants or capris are ideal. Avoid loose-fitting pants that can get in the way of the bike.
FOOTWEAR OPTIONS:
Wear lightweight cross-training shoes. To ride, slip your feet securely into the pedal baskets. If cycling shoes are required to ride, many studios will offer rental pairs. These shoes are equipped with clips on the sole that lock to the base of each pedal, providing enhanced support. Wearing cycling shoes can help you to ride more efficiently and engage every leg muscle.
READY TO RIDE
Prep for your class with these essential terms and tips:
1. SEAT HEIGHT
Avoid putting unnecessary pressure on your knees by adjusting your seat to the appropriate height.
To do this, start by standing next to your bike, with the top of the seat near your hip. Next, climb on and take a seat. With your foot at the bottom of the pedal stroke, your leg should have a very slight bend at the knee. If your leg is straight and your knee is locked, your seat is too high. If your knee is extremely bent, your seat is too low.
2. CLIP IN
If your class uses bikes that require cycling shoes, you’ll need to clip in. To do so, sit on your bike and spin the pedal upside down. Line up the clips on the bottom of your shoe with the clips on the center of the pedal and step down. You will hear it snap or click into place. You should be able to pull up on your foot without lifting it off the pedal. Pedal around and do the same with the other foot. Give it a test run — the movement should feel smooth and steady.
When you’re done with class, turn your ankle outwards, away from the bike to release your foot. “This can often be trickier than clipping in,” Alexandra says.
3. PROPER FORM
Maintaining a firm core is crucial to enjoying a healthy and safe cycling class. Relax your shoulders and look out at the “road” ahead. Take deep breaths in through your nose and exhale through your mouth.
4. RESISTANCE
Alexandra recommends maintaining some amount of resistance, or tension, on the bike at all times. This will help to protect your joints. In addition, “the right amount of resistance is what separates a calorie-scorching, fat-burning workout from a mediocre one. You get out of this class what you put into it, so if an instructor tells you to turn up the tension, do it!”
If the bike has a resistance knob, turn it to the right to increase resistance. Turn it to the left to decrease resistance. If the bike has a gear handle, simply lift it up to add tension. If you begin to feel tension in your lower back, dial the resistance back.
5. HAND POSITIONS
Throughout class, you’ll hear the instructor call out the following:
HAND POSITION 1: Place your hands directly in front of you on the handlebars.
HAND POSITION 2: Place your hands on the handlebars naturally, as you would when riding a regular bike.
HAND POSITION 3: Place your hands on the top of the handles and point your thumbs over the tip of the handlebars.

6. THE CUES
A typical indoor cycling class will consist of high-intensity intervals that incorporate the following moves:
SEATED CLIMB
Place your hands in Position 1 or 2. Increase the resistance and slightly drop your heels back towards the floor to engage your core muscles. These climbs, which mimic hills or inclines, are meant to be challenging, building endurance and strength.
STANDING FLAT OR RUN
Place your hands in Position 2. Stand upright and keep your feet flat. It’s important that you don’t point your toes downward. The running position helps to stabilize the lower body and improves endurance.
STANDING CLIMB
Place your hands in Position 3. Lift up and hover over the saddle. This movement simulates climbing extremely steep hills, and like the seated climb, builds endurance and strength.
JUMPS
Jumps transition you in and out of the saddle between the seated flat, standing flat and standing climb positions. Most instructors will call jumps on a 4, 8 or 16 count.
7. A FEW FINAL TIPS
“If you’re a newbie to indoor cycling, you may be worried about feeling lost or overwhelmed. That’s perfectly normal, but it shouldn’t deter you from trying,” says Alexandra. With that in mind, here is her expert advice for enjoying a great first class:
- Arrive early. Introduce yourself to the instructor so that you can set up your bike properly and get situated.
- Choose a bike in the middle or front of the room. Make sure the instructor is in plain view. If you start to feel overwhelmed, sit back and just pedal! It may take a few classes to truly feel comfortable with all the positions.
- Go at your own pace. No one will notice if you need to skip a turn or two of resistance.
- Stay for the cooldown. You’ll avoid injury and keep tightness and sore muscles to a minimum.
- If it’s your first time trying this type of workout, you may be sore the next day. Take time to stretch after class. Once you attend several classes and your body adjusts to the movements, feelings of soreness will be rare.
- Proper hydration is absolutely essential. Drink up before, during and after class. Many instructors will frequently remind you to grab a drink, but you don’t have to wait for a cue to take a water break.

© 2025 DICK's Sporting Goods
*Price Promotions - Due to manufacturer restrictions, select new release and other specified products are excluded from price promotions. Additionally, there are restrictions on the use of coupon codes.
If you are using a screen reader and are having problems using this website, please call 877-846-9997 for assistance.